Jumat, 24 Desember 2010

POINTBLANK dan Modem AHA

Saya tidak bermaksud promosi atau memilih beberapa hal yang berhubungan dengan suatu produk, saya hanya bermaksud share tentang info dan pengalaman saya selama menggunakan suatu produk, mohon di catat yang gan, wkwkwkw

Baru baru ini saya membeli suatu produk MODEM AHA, saya tertarik untuk memiliki-nya karena bandwidth yang ditawarkan cukup menggiurkan dan tentunya juga mengenai biasa yang realatif sangat murah.Karena menggunakan jalur CDMA dengan EVDO 2
Coba anda bayangkan (jangan kebablasan ya gan)| wkakakakakaka
Info yang diberikan dalam aha.co.id adalah sebagai berikut :

Dimana sebelum kita memutuskan untuk berlangganan paket yang disediakan diatas kita disuruh mencoba paket Advan EVDO genereasi ke 2 yang dipakai daalam distribusi data di modem ini.
Fantastik …….
itulah kata pertama yang saya dapatkan dari hari pertama pemakaian AHA, bandwidth yang ditawarkan ternyata benar mencapi angka di atas 2,1 mbps tapi di atas jam 1 malam (wakakakak), kalau dalam rentang jam sibuk sekitar 780 kbps (dengan catatan masuk coverage area + 5 bar sinyal)
Kalau sinyal hanya + 4 saja, pada jam sibuk Cuma mendapatkan 450 kbps, sungguh drop nya sangat gede banget.
Nah selain itu tibalah saatnya gw pergi keluar kota nih, uh apa rewel ya …? Tentu saja saya bergegas call Customer Service dan sungguh sangat mudah, karena kita tidak perlu lagi melakukan settingan ulang jika di luar kota asal, padahal jalur yang dipake adalah CDMA, Aha ini menggunakan Provider ESIA dengan catatan modem hanya digunakan untuk jalur DATA saja, bukan JALUR CALL, tentu donk sangat menggembirakan, hmmmmm, seneng mode:on deh
Berlanjutlah Saya ingin mengetahui kedigdayaan Modem Ini, Langsung saja saya mainkan game POINTBLANK melalui jalur MODEM ini, wooow, terkejut juga saya melihat ping dari konsol game POINTBLANK langsung warna ijo ||||| +5 Bok, tapi dengan catatan di RM juga warnanya Ijo, kalau warna coklat deh pasti amblas tuh ping-nya. Namun jangan seneng dulu, karena kalau untuk maen game karena bw tarikannya kuat maka modem ini ternyata naik turun drastis banget, so intinya kalau untuk main POINTBLANK tentu nyaman dengan CATATAN KHUSUS.
Advance nih bagaimana dengan download
Woke dicobain deh untuk download dari beberapa SERVER, dimulai dari server INDONESIA, mengambil data dari INDOWEBSTER.com Mozila 12.58 MB gw sikat dalam waktu 2 menit, wkwkwkw, kenceng sekali deh dengan rate download 153 perdetik, tanpa accelerator download. Jika menggunakan IDM jadinya downrate nya 203 perdetik.
4shared.com website share favorite saya coba mendownload lagunya Agnes Monica, 4.5MBPS file di sana di download dengan waktu Cuma 3 menit : 2 detik, fantastik deh.
Woke
Ngomong ngalor ngidul nih, wis kesel tenan | wkwkwkw
Kasih tips aja deh untuk oprek modem AHA,
  • Modem ini tiap kita mengkoneksikan memiliki alur IP dan Getaway yang berbeda beda,maka jika berhasil berkoneksi tetapi terasa lambat, matikan koneksinya, dan lakukan koneksi ulang, cari koneksi ping yang paling besar, Untuk mengetahui caranya bias di lihat pada tulisan saya yang lain di Lihat Koneksi melalui Command Promt di blog ini juga
  • Test kecepatan bandwidth anda dengan real bandwith meter di http://bwmeter.i2.co.id dan lihat berapa kecepatannya
  • DNS | Domain Name System dari modem ini akan selalu sama, yaitu
    • Primary DNS    : 202.152.192.35
    • Secondary DNS    : 202.152.203.2
      ubahlah DNS ini untuk dilarikan ke Google DNS yaitu :
    • P-DNS        : 8.8.8.8
    • S-DNS        : 8.8.4.4
      Terasa lebih kencang ngibritnya.
      Cara Mengubahnya adalah sbb
      • Disconected terlebih dahulu
      • Arahkan pada AHA (default) klik tombol sampingnya gambar di bawah
      • Pilih Edit
      • Tab HIGher Class Ubahlah GET DNS AUTOMATICALLY ke APPOINTED DNS
      • Isi pada Pref DNS : 8.8.8.8
      • Isi pada Spare DNS : 8.8.4.4
      • Simpan
      • Restar Modem


Rabu, 22 Desember 2010

Sharing di WP

Mungkin tidak begitu aneh yang dah sering oprek Wodpress.com (saya singkat WP). Namun yang belum biasa oprek atau baru newbie seperti saya ini ada sedikit tambahan yang di tanamkan di wordpress via wordpress.com ini yaitu adanya fasiltitas Sharing (indo : Berbagi).
Karena Ketenaran dunia social comunity lah maka WP sedikit punya ide untuk itu dan tentu saja sangat berpengaruh, karena dengan seringnya kita mengupdate maka otomatis nantinya akan bisa di plug-in via social comunity.
Cara Aktifkan Fasilitas Sharing ini bisa kita dapatkan dari :
Menu Kiri Setting | pilih Sharing
Drag Icon-Icon dalam | Availabe Service ke | Enable Service |
Save Changes.


Senin, 20 Desember 2010

bikin aplikasi portable dengan thinstall

Seblumnya kita mengetahui bahwa perkembangan tehnologi yang begitu hebat, dengan kemunculan media penyimpanan seperti Flash disk dan lain lain sungguh menjadi monumental sekali. Beserta berbagai pernah pernik didalamnya.Pernak pernik itu antara lain :
  • System Sekurity
  • Tools USB dll
  • Aplikasi di USB (portable)
Berikut ini yang akan saya sampaikan adalah membuat program yang bisa dijalankan oleh USB flash disk. kemudian program itu disebut program portable. Program yang bisa digunakan untuk membuat program menjadi portable adalah THINSTALL. di bawah ini langkahnya sebagi berikut :

Tutorial Membuat Aplikasi Portabel Menggunakan THINSTALL
oleh ynbs
Pada kesempatan ini saya akan membuat atau memportablekan program Open Office. Berikut ini langkah-langkah untuk membuat aplikasi portabel OPEN OFFICE
  • Siapkan master software OpenOffice (aplikasi mentah yang belum diinstal). Download OpenOffice di http://download.openoffice.org
  • Download software THINSTALL di http://www.thinstall.com/sales/trialeval.php (ini adalah versi trial 30 hari, sehingga Aplikasi Portabel yang dibuat dengan versi trial ini juga hanya bisa digunakan selama max 30 hari). Kemudian lakukan instalasi. Saya sarankan komputer langsung direstart.
  • Jalankan Thinstall dengan mendobel klik SetupCapture, lalu klik Start >>, lalu akan terbuka window baru dalam mode DOS dan tunggu beberapa saat sampai muncul window ke tiga. Lalu klik Pre-Install Scan dan tunggu beberapa saat sehingga muncul window dalam mode DOS lagi.
    Tips : jangan melakukan aktivitas selain installasi open office di komputer anda, karena nantinya akan direkam oleh program ini.
  • Setelah selesai akan muncul window yang ke-5. Lalu lakukan instalasi OpenOffice seperti biasa sampai finish. Jangan klik dahulu Post-Install Scan
  • Setelah instalasi OpenOffice selesai, kembali ke window ke-5 dan klik Post-Install Scan, sehingga muncul window ke-6, tunggu beberapa saat sehingga muncul window dalam mode DOS lagi. Lalu akan muncul window ke-9 kemudian klik Save Result >>, dan akan muncul window DOS untuk yang kesekian kalinya, dan tunggu beberapa saat sampai window menutup sendiri.
  • Lalu akan muncul window Setup Capture Complete, lalu klik Quit.
  • Sampai sekarang proses telah selesai tapi belum FIX, atau belum kita kompile menjadi program yang benar-banar berdiri sendrir.
  • sekarang kita lihat pada folder default C :P rogramFile/ /ThinstallVS/Capture/OpenOffice2.37.
  • Setting sebelum melakukan proses kompile
    1. Buka (Open) file Package.ini, lakukan editing menggunakan Notepad.
    2. ganti CompressionType=None dengan CompressionType=Fast
    3. ganti DirectoryIsolationMode=WriteCopy dengan DirectoryIsolationMode=Merged
    4. Lalu simpan (save)
    5. Copy file #attributes yang ada di folder %Desktop% ke folder yang terdapat file build.bat. Lalu dobel klik file build.bat sehingga muncul window dalam mode DOS, tunggu beberapa saat sampai menutup sendiri. Jika proses build ini selesai akan menciptakan folder baru bernama bin di default folder C :P rogram FilesThinstallVSCaptureOpenOffice2.3, dan file-file dalam folder bin inilah yang merupakan Aplikasi OpenOffice Portabel. Anda bisa mengcopy nya dan digunakan dikomputer lain tanpa harus meng installnya
    • Sebaiknya pembuatan aplikasi portabel ini dilakukan pada kondisi clean Windows instalasi. Artinya baru saja di instal Window belum diinstal aplikasi lain. Untuk melakukan clean Windows Instalasi tanpa merusak Windows yang sudah ada, bisa menggunakan VMWARE atau Microsoft VIRTUALPC
    • Selamat mencoba. Semoga bermanfaat.


Sabtu, 18 Desember 2010

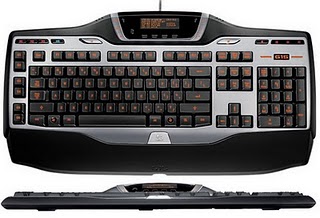
LEbiH 100 shortcut pada PaPAn KEYBOARD anda

Mari kita cuba….
1st Key…. ( kalau tak buleh… cuba yang 2nd key ok… )
Keyboard Shorcuts (Microsoft Windows)
1. CTRL+C (Copy)
2. CTRL+X (Cut)
3. CTRL+V (Paste)
4. CTRL+Z (Undo)
5. DELETE (Delete)
6. SHIFT+DELETE (Delete the selected item permanently without placing the item in the Recycle Bin)
7. CTRL while dragging an item (Copy the selected item)
8. CTRL+SHIFT while dragging an item (Create a shortcut to the selected item)
9. F2 key (Rename the selected item)
10. CTRL+RIGHT ARROW (Move the insertion point to the beginning of the next word)
11. CTRL+LEFT ARROW (Move the insertion point to the beginning of the previous word)
12. CTRL+DOWN ARROW (Move the insertion point to the beginning of the next paragraph)
13. CTRL+UP ARROW (Move the insertion point to the beginning of the previous paragraph)
14. CTRL+SHIFT with any of the arrow keys (Highlight a block of text)
SHIFT with any of the arrow keys (Select more than one item in a window or on the desktop, or select text in a document)
15. CTRL+A (Select all)
16. F3 key (Search for a file or a folder)
17. ALT+ENTER (View the properties for the selected item)
18. ALT+F4 (Close the active item, or quit the active program)
19. ALT+ENTER (Display the properties of the selected object)
20. ALT+SPACEBAR (Open the shortcut menu for the active window)
21. CTRL+F4 (Close the active document in programs that enable you to have multiple documents open simultaneously)
22. ALT+TAB (Switch between the open items)
23. ALT+ESC (Cycle through items in the order that they had been opened)
24. F6 key (Cycle through the screen elements in a window or on the desktop)
25. F4 key (Display the Address bar list in My Computer or Windows Explorer)
26. SHIFT+F10 (Display the shortcut menu for the selected item)
27. ALT+SPACEBAR (Display the System menu for the active window)
28. CTRL+ESC (Display the Start menu)
29. ALT+Underlined letter in a menu name (Display the corresponding menu) Underlined letter in a command name on an open menu (Perform the corresponding command)
30. F10 key (Activate the menu bar in the active program)
31. RIGHT ARROW (Open the next menu to the right, or open a submenu)
32. LEFT ARROW (Open the next menu to the left, or close a submenu)
33. F5 key (Update the active window)
34. BACKSPACE (View the folder one level up in My Computer or Windows Explorer)
35. ESC (Cancel the current task)
36. SHIFT when you insert a CD-ROM into the CD-ROM drive (Prevent the CD-ROM from automatically playing)
Dialog Box Keyboard Shortcuts
1. CTRL+TAB (Move forward through the tabs)
2. CTRL+SHIFT+TAB (Move backward through the tabs)
3. TAB (Move forward through the options)
4. SHIFT+TAB (Move backward through the options)
5. ALT+Underlined letter (Perform the corresponding command or select the corresponding option)
6. ENTER (Perform the command for the active option or button)
7. SPACEBAR (Select or clear the check box if the active option is a check box)
8. Arrow keys (Select a button if the active option is a group of option buttons)
9. F1 key (Display Help)
10. F4 key (Display the items in the active list)
11. BACKSPACE (Open a folder one level up if a folder is selected in the Save As or Open dialog box)
Microsoft Natural Keyboard Shortcuts
1. Windows Logo (Display or hide the Start menu)
2. Windows Logo+BREAK (Display the System Properties dialog box)
3. Windows Logo+D (Display the desktop)
4. Windows Logo+M (Minimize all of the windows)
5. Windows Logo+SHIFT+M (Restore the minimized windows)
6. Windows Logo+E (Open My Computer)
7. Windows Logo+F (Search for a file or a folder)
8. CTRL+Windows Logo+F (Search for computers)
9. Windows Logo+F1 (Display Windows Help)
10. Windows Logo+ L (Lock the keyboard)
11. Windows Logo+R (Open the Run dialog box)
12. Windows Logo+U (Open Utility Manager)
13. Accessibility Keyboard Shortcuts
14. Right SHIFT for eight seconds (Switch FilterKeys either on or off)
15. Left ALT+left SHIFT+PRINT SCREEN (Switch High Contrast either on or off)
16. Left ALT+left SHIFT+NUM LOCK (Switch the MouseKeys either on or off)
17. SHIFT five times (Switch the StickyKeys either on or off)
18. NUM LOCK for five seconds (Switch the ToggleKeys either on or off)
19. Windows Logo +U (Open Utility Manager)
20. Windows Explorer Keyboard Shortcuts
21. END (Display the bottom of the active window)
22. HOME (Display the top of the active window)
23. NUM LOCK+Asterisk sign (*) (Display all of the subfolders that are under the selected folder)
24. NUM LOCK+Plus sign (+) (Display the contents of the selected folder)
25. NUM LOCK+Minus sign (-) (Collapse the selected folder)
26. LEFT ARROW (Collapse the current selection if it is expanded, or select the parent folder)
27. RIGHT ARROW (Display the current selection if it is collapsed, or select the first subfolder)
Shortcut Keys for Character Map
After you double-click a character on the grid of characters, you can move through the grid by using the keyboard shortcuts:
1. RIGHT ARROW (Move to the right or to the beginning of the next line)
2. LEFT ARROW (Move to the left or to the end of the previous line)
3. UP ARROW (Move up one row)
4. DOWN ARROW (Move down one row)
5. PAGE UP (Move up one screen at a time)
6. PAGE DOWN (Move down one screen at a time)
7. HOME (Move to the beginning of the line)
8. END (Move to the end of the line)
9. CTRL+HOME (Move to the first character)
10. CTRL+END (Move to the last character)
11. SPACEBAR (Switch between Enlarged and Normal mode when a character is selected)
Microsoft Management Console (MMC)
Main Window Keyboard Shortcuts
1. CTRL+O (Open a saved console)
2. CTRL+N (Open a new console)
3. CTRL+S (Save the open console)
4. CTRL+M (Add or remove a console item)
5. CTRL+W (Open a new window)
6. F5 key (Update the content of all console windows)
7. ALT+SPACEBAR (Display the MMC window menu)
8. ALT+F4 (Close the console)
9. ALT+A (Display the Action menu)
10. ALT+V (Display the View menu)
11. ALT+F (Display the File menu)
12. ALT+O (Display the Favorites menu)
MMC Console Window Keyboard Shortcuts
1. CTRL+P (Print the current page or active pane)
2. ALT+Minus sign (-) (Display the window menu for the active console window)
3. SHIFT+F10 (Display the Action shortcut menu for the selected item)
4. F1 key (Open the Help topic, if any, for the selected item)
5. F5 key (Update the content of all console windows)
6. CTRL+F10 (Maximize the active console window)
7. CTRL+F5 (Restore the active console window)
8. ALT+ENTER (Display the Properties dialog box, if any, for the selected item)
9. F2 key (Rename the selected item)
10. CTRL+F4 (Close the active console window. When a console has only one console window, this shortcut closes the console)
Remote Desktop Connection Navigation
1. CTRL+ALT+END (Open the Microsoft Windows NT Security dialog box)
2. ALT+PAGE UP (Switch between programs from left to right)
3. ALT+PAGE DOWN (Switch between programs from right to left)
4. ALT+INSERT (Cycle through the programs in most recently used order)
5. ALT+HOME (Display the Start menu)
6. CTRL+ALT+BREAK (Switch the client computer between a window and a full screen)
7. ALT+DELETE (Display the Windows menu)
8. CTRL+ALT+Minus sign (-) (Place a snapshot of the active window in the client on the Terminal server clipboard and provide the same functionality as pressing PRINT SCREEN on a local computer.)
9. CTRL+ALT+Plus sign (+) (Place a snapshot of the entire client window area on the Terminal server clipboard and provide the same functionality as pressing ALT+PRINT SCREEN on a local computer.)
Microsoft Internet Explorer Navigation

1. CTRL+B (Open the Organize Favorites dialog box)
2. CTRL+E (Open the Search bar)
3. CTRL+F (Start the Find utility)
4. CTRL+H (Open the History bar)
5. CTRL+I (Open the Favorites bar)
6. CTRL+L (Open the Open dialog box)
7. CTRL+N (Start another instance of the browser with the same Web address)
8. CTRL+O (Open the Open dialog box, the same as CTRL+L)
9. CTRL+P (Open the Print dialog box)
10. CTRL+R (Update the current Web page)
11. CTRL+W (Close the current window)
2nd Key :
1. CTRL+C (Copy)
2. CTRL+X (Cut)
3. CTRL+V (Paste)
4. CTRL+Z (Undo)
5. DELETE (Delete)SHIFT+DELETE (Delete the selected item permanently without placing the item in the Recycle Bin)
6. CTRL+SHIFT while dragging an item (Create a shortcut to the selecteditem)
7. F2 key (Rename the selected item)
8. CTRL+RIGHT ARROW (Move the insertion point to the beginning of the next word)
9. CTRL+LEFT ARROW (Move the insertion point to the beginning of the previous word)
10. CTRL+DOWN ARROW (Move the insertion point to the beginning of the next paragraph)
11. CTRL+UP ARROW (Move the insertion point to the beginning of the previous paragraph)
12. CTRL+SHIFT with any of the arrow keys (Highlight a block of text)
13. CTRL+A (Select all)
14. F3 key (Search for a file or a folder)
15. ALT+ENTER (View the properties for the selected item)
16. ALT+F4 (Close the active item, or quit the active program)
17. ALT+ENTER (Display the properties of the selected object)
18. ALT+SPACEBAR (Open the shortcut menu for the active window)
19. CTRL+F4 (Close the active document in programs that enable you to have multiple documents open simultaneously)
20. ALT+TAB (Switch between the open items)
21. ALT+ESC (Cycle through items in the order that they had been opened)
22. F6 key (Cycle through the screen elements in a window or on the desktop)
23. F4 key (Display the Address bar list in My Computer or Windows Explorer)
24. SHIFT+F10 (Display the shortcut menu for the selected item)
25. ALT+SPACEBAR (Display the System menu for the active window)
26. CTRL+ESC (Display the Start menu)
27. ALT+Underlined letter in a menu name (Display the corresponding menu)
28. F10 key (Activate the menu bar in the active program)
29. RIGHT ARROW (Open the next menu to the right, or open a submenu)
30. LEFT ARROW (Open the next menu to the left, or close a submenu)
31. F5 key (Update the active window)
32. BACKSPACE (View the folder one level up in My Computer or Windows Explorer)
33. ESC (Cancel the current task)
34. SHIFT when you insert a CD-ROM into the CDROM drive (Prevent the CD-ROM from automatically playing)
35. CTRL+TAB (Move forward through the tabs)
36. CTRL+SHIFT+TAB (Move backward through the tabs)
37. TAB (Move forward through the options)
38. SHIFT+TAB (Move backward through the options)
39. ALT+Underlined letter (Perform the corresponding command or select the corresponding option)
40. ENTER (Perform the command for the active option or button)
41. SPACEBAR (Select or clear the check box if the active option is a check box)
42. Arrow keys (Select a button if the active option is a group of option buttons)
43. F1 key (Display Help)
44. F4 key (Display the items in the active list)
45. BACKSPACE (Open a folder one level up if a folder is selected in the
46. Windows Logo (Display or hide the Start menu)
47. Windows Logo+BREAK (Display the System Properties dialog box)
48. Windows Logo+D (Display the desktop)
49. Windows Logo+M (Minimize all of the windows)
50. Windows Logo+SHIFT+M (Restore the minimized windows)
51. Windows Logo+E (Open My Computer)
52. Windows Logo+F (Search for a file or a folder)
53. CTRL+Windows Logo+F (Search for computers)
54. Windows Logo+F1 (Display Windows Help)
55. Windows Logo+ L (Lock the keyboard)
56. Windows Logo+R (Open the Run dialog box)
57. Windows Logo+U (Open Utility Manager) Accessibility Keyboard Shortcuts
58. Right SHIFT for eight seconds (Switch FilterKeys either on or off)
59. Left ALT+left SHIFT+PRINT SCREEN (Switch High Contrast either on or off)
60. Left ALT+left SHIFT+NUM LOCK (Switch the MouseKeys either on or off)
61. SHIFT five times (Switch the StickyKeys either on or off)
62. NUM LOCK for five seconds (Switch the ToggleKeys either on or off)
63. Windows Logo +U (Open Utility Manager)
64. END (Display the bottom of the active window)
65. HOME (Display the top of the active window)
66. NUM LOCK+Asterisk sign (*) (Display all of the subfolders that are under the selected folder)
67. NUM LOCK+Plus sign (+) (Display the contents of the selected folder)
68. NUM LOCK+Minus sign (-) (Collapse the selected folder)
69. LEFT ARROW (Collapse the current selection if it is expanded, or select the parent folder)
70. RIGHT ARROW (Display the current selection if it is collapsed, or select the first subfolder)
71. RIGHT ARROW (Move to the right or to the beginning of the next line)
72. LEFT ARROW (Move to the left or to the end of the previous line)
73. UP ARROW (Move up one row)
74. DOWN ARROW (Move down one row)
75. PAGE UP (Move up one screen at a time)
76. PAGE DOWN (Move down one screen at a time)
77. HOME (Move to the beginning of the line)
78. END (Move to the end of the line)
79. CTRL+HOME (Move to the first character)
80. CTRL+END (Move to the last character)
81. SPACEBAR (Switch between Enlarged and Normal mode when a character is selected)
82. CTRL+O (Open a saved console)
83. CTRL+N (Open a new console)
84. CTRL+S (Save the open console)
85. CTRL+M (Add or remove a console item)
86. CTRL+W (Open a new window)
87. F5 key (Update the content of all console windows)
88. ALT+SPACEBAR (Display the MMC window menu)
89. ALT+F4 (Close the console)
90. ALT+A (Display the Action menu)
91. ALT+V (Display the View menu)
92. ALT+F (Display the File menu)
93. ALT+O (Display the Favorites menu)
94. MMC Console Window Keyboard Shortcuts
95. CTRL+P (Print the current page or active pane)
96. ALT+Minus sign (-) (Display the window menu for the active console window)
97. SHIFT+F10 (Display the Action shortcut menu for the selected item)
98. F1 key (Open the Help topic, if any, for the selected item)
99. F5 key (Update the content of all console windows)
100. CTRL+F10 (Maximize the active console window)
dan terdapat beberapa lagi shortcut yg buleh kita pelajari tapi mengikut software yang ada…. cthnya : photoshop…. micromedia flash… swiss… dan pelbagai lagi… yang mungkin ada persamaan dan penambahan lagi pada shortcut keyboard yang ada pada pc dan laptop kiter…. SELAMAT MENCUBA…


Membuat animasi dari gambar dengan easy gif animator

Tutorial - Membuat animasi dari gambar
Tutorial ini akan membantu Anda untuk belajar cara membuat animasi GIF dari foto Anda sendiri tanpa menggunakan Animasi Wizard.

Untuk belajar membuat animasi dari awal dengan menggambar gambar Anda sendiri, klik di sini untuk tutorial lainnya.


Langkah 1 - Siapkan gambar.
Siapkan beberapa file gambar, yang akan Anda gunakan untuk membuat animasi Anda. Disarankan bahwa mereka semua adalah dari ukuran yang sama.


Langkah 2 - animasi baru Mulai.
Pada menu File, klik New. Jika Animasi Wizard muncul, klik Batal untuk menutupnya.


Langkah 3 - Tambahkan gambar Anda.

Pada menu Frame, klik Sisipkan. Anda juga dapat menggunakan tombol toolbar yang sesuai.
Pilih file gambar. Anda dapat memilih beberapa file dengan menekan tombol Ctrl.
Klik Buka.
Anda dapat mengulangi langkah ini untuk menambahkan sebanyak mungkin banyak gambar dari folder yang berbeda seperti yang anda inginkan.

Untuk informasi lebih lanjut tentang menambahkan gambar, membaca topik Tambah dan Hapus bingkai


Langkah 4 - kerangka waktu tampilan Customize (durasi).
Anda dapat menentukan untuk berapa lama setiap gambar akan ditampilkan. Secara default tampilan waktu 0,5 detik. Anda dapat mengubah ini untuk setiap frame.

Klik frame untuk memilihnya. Kemudian pada tab Frame Delay menentukan nilai pilihan dalam 1 / 100 dari kenaikan kedua (misalnya 100 akan mengatur durasi gambar ke satu detik).


Langkah 5 - Pratinjau animasi Anda.
Klik pada tab Pratinjau. Ini akan membuka gambar GIF pemain.


Langkah 6 - Simpan animasi Anda.
Untuk menyimpan gambar Anda, pada menu Berkas, klik Simpan.


  Catatan

Dapat menggunakan Atas dan Bawah tombol panah pada toolbar kiri untuk memindahkan bingkai dipilih (s).
Untuk menghapus frame yang dipilih, pada menu Frame, klik Hapus atau menggunakan tombol toolbar yang sesuai.


Twitter Delicious Facebook Digg Favorites More